Houdini provides users with a wide range of functional blocks (nodes) with which you can build up logical schemes of any complexity to work with computer graphics.
My follow-up work is based on the analysis, formalization and straight repetition of a tutorials presented on texturing.xyz. I relied most on “Sefki Ibrahim - Realtime Digital Double with Character Creator and TexturingXYZ” and “Pietro Berto / Making of Emmanuel”.
I want to say thanks to the authors for their incredible work and clear demonstration of their workflow.
Step 1. Texture projection on mesh
I imported the character directly from Character Creator through GoZ import node. Removed the eyelashes and subdivided the mesh several times.

Then created and put on against the face a plane and set its proportions to same as in purchased photo of scanned skin.

Then marked the corresponding points between the scan and the mesh in the Topo Transfer node.


Started the projecting process.

Step 1.1. Fixing the projected plane
When projecting is done, not all areas usually lay as they should, especially on the ear tips an earlobe, as well as nostrils.

I hand-adjusted my ears and nose with the Push Tool (similar to the Move brush in zbrush) from the Modeler plugin for Houdini.

Then smoothed out in projection mode the problem areas through the nod of Topobuild retopology.

Step 2. Baking textures.
The texturing.xyz’s set contains 3 different multichannel maps - Albedo (Skin Color), Displacement (Pores info), Utility (Additional info). I needed to bake them to UV coordinates of my character. I took one of the SideFX Labs nodes called Simple baker and used a mesh which I transferred earlier from GoZ as a target geometry, and put projected plane as baking source, which I can use to lay textures for baking.


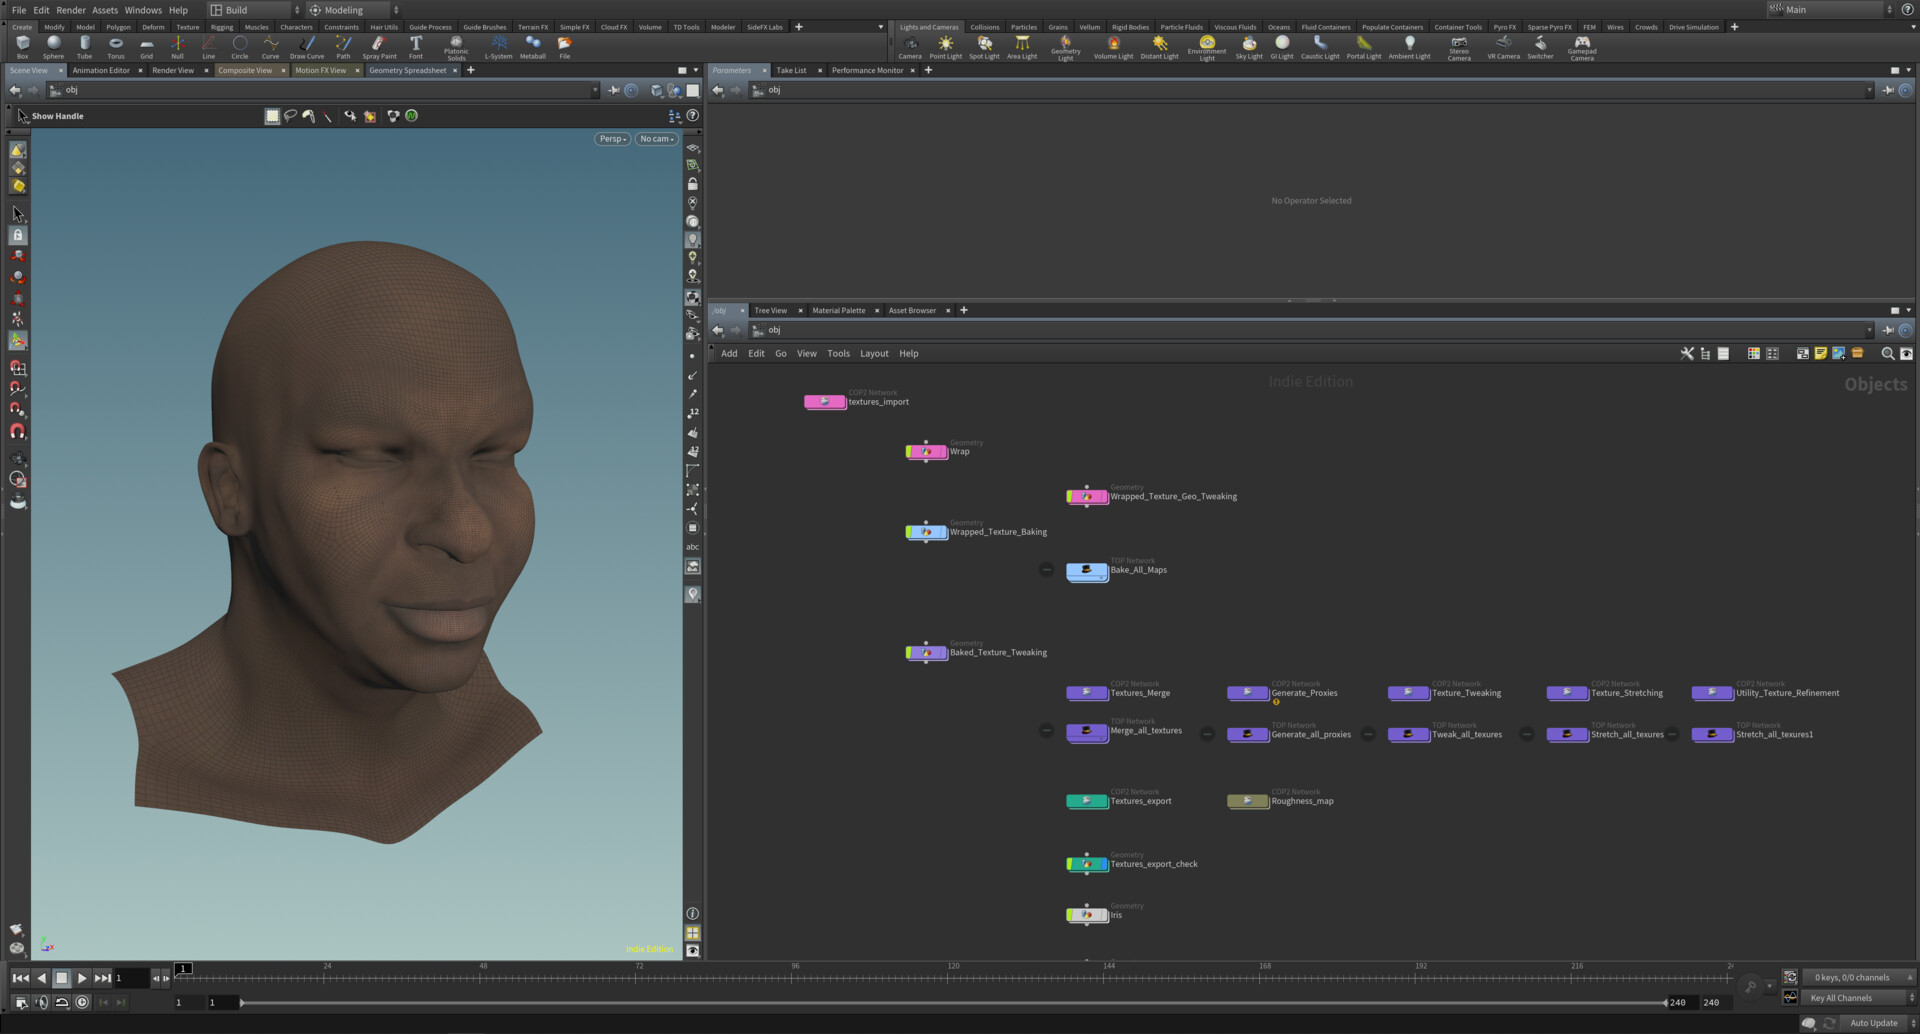
Step 2.1. A bit of automatization.
I won’t to bake textures manually one by one, plus baking high-resolution textures takes a long time, so I decided to delegate some work to Houdini, because Houdini has blocks for tasks automation (PDG or TOP nodes). I created a scheme which tells Houdini that I need to accomplish three times a typical task:
1. Change the input texture via a switch with number of current task.
2. Change the name of the map to import (original texture).
3. Change the name of the map to export (processed texture).
4. Bake the texture.

Now I can bake several textures at once with the touch of a button.

Step 3. Textures mixing.
Since the textures used for baking covered only part of the face, they lack information about other parts of the mesh. I’ve used default base mesh maps to get missing info.

For mixing I used two masks:
The first I painted the color in the viewport right on the mesh with Paint node and transferred this information to the UV.

I figured out how to do this by the examples by Symek and Hughspeers from Odforce.net forum. Thank you, guys.

vector uv  = set(X,Y,0);
string path = "op:" + opfullpath('../../Baked_Texture_Tweaking/invert_color');
vector clr = uvsample(path, "Cd", "uv", uv);
R = clr.x;
G = clr.y;
B = clr.z;
I drew the second mask right on top of the UV coordinates through Rotoshape compositing node. Then I blurred the contours of the masks and combined it together with previous one.

In the further I continued to process the images adhering to this non-destructive approach.
Note: at this step I made several mistakes that I tried not to repeat in the next.
1. I didn't input the original image to Rotoshape, so this mask doesn't scale and only works with maps in 8k resolution, and it doesn't show up correctly on the node previews.
2. I didn't use proxy images to speed up work. In the current state Houdini’s compositing nodes doesn’t use the OpenCL library to speed up calculations with GPU, so working with high-resolution images becomes slow, but this issue is solved by using a proxy images with reduced resolution.

Step 3.1 A bit of automatization.
Repetition of step 2.5 only for textures mixing procedure. On the way out, I'll get 3 new temporary textures.
Step 4. Proxy images preparation.
To speed up further image processing, I generated copies of all the maps in ¼ ratio to the origin. And again, automated this process.

Step 5. Textures adjustments.
Throughout a textures there were many small places with extra information to be removed, such as eyelashes on the eyes, too dark nostrils, chin and insides of the ears.
I used a mixing technique from step 3 but alternated sources to find good looking part of the skin for overlay, these were:
1. The map itself simply shifted by UV coordinates.
2. Original skin texture from texturing.xyz
3. The map itself but mirrored.
Then repeated all the operations for the rest of the maps through the task nodes.

Step 5.1 Textures stretching.
During the baking process, the lips weren’t projected deep enough inside the mouth, to correct this I cut out the upper and lower lips and stretched them down and up accordingly with the Pin transform compositing node, then put them back on the source map and removed the extra info with a mask.

Step 5.2. Utility map adjustment
From the Utility map I needed information about the face front (for the roughness map), so I painted everything else black. And made a few small adjustments like in step 5.

Step 6. Textures export.
I split utility maps and displacement maps by channels because each channel contains unique info about the skin and preserved as individual linear image.

Step 7. Roughness map creation.
Character Creator allows you to flexibly adjust roughness for individual areas of the face, so I was required to create an average map with pores on the skin. To do this, I took the B channel from the utility card and inverted it, then multiplied it into an inverted channel R of displacement map. Then reduced the contrast and brightness.

To be honest, I’m not satisfied with this method, I'd like to experiment with other ways of generating it in the future.
At this point, the preparation of the additional maps in Houdini was over, and I moved to Zbrush to mix the displacement maps, add details and bake them to a normal map.

I imported the model from Character Creator through the GoZ again and subdivide the model to level 7.

Then I created 3 layers for displacement maps and imported them one by one, adjusting the visibility of the layer by the eye.
Addition layer was created for my own pores and wrinkles, which I was able to see on the references. My character is young, so he doesn't have a strong skin defects. There are some scars on the references but I didn’t sculpt them in order to don’t tie the character to a particular person. At the same time, I can add them later through SkinGen in Character Creator.

I’ve also added the micro skin by adding procedural noise and pushed it out in places where were no displacement maps, this noise is needed to smooth out the sharp transitions of displacement maps while working in Zbrush, but I did not baked it out, because Character Creator has its own micro-normal maps.

When I've done sculpting, I’ve baked and exported normal maps and moved to the eyes.

I’ve also put the maps to SkinGen multiply layer for minimal checking.

Thanks for reading and see you in the next chapters.
